Getting Started
Getting Started
Installation
Installation
Inspect Traffic
Inspect Traffic
HTTP Rules (Modify Traffic)
HTTP Rules (Modify Traffic)
Overview
Request Modification — Redirect URL (Map Local, Map Remote)
Request Modification — Replace Strings (Switch Hosts, API Endpoints)
Request Modification — Modify Headers
Request Modification — Modify Request Body
Response Modification — Modify Response Body
Request Modification — Modify Query Params
Request Modification — Modify User Agents
Request Modification — Delay Request
Request Modification — Map Local
Request Modification — Map Remote
Response Modification — Modify DOM/Inject scripts
Response Modification — Cancel Rule
Predefined Functions
Organizing Rule — Grouping
Organizing Rule — Import/Export Rules from File
Organizing Rule — Pause/Resume Requestly
Organizing Rule — Rule Operators
Organizing Rule — Advance Targeting
Organizing Rule — Sharing Rules
Organizing Rule — Pinning Rules
GraphQL - Modify Request & Response
Import / Export — Charles Proxy Rules
Test Rules — Test URL Condition
Test Rules — Test this Rule
Session Book
Session Book
File Server
File Server
Public API
Public API
Guides
Guides
TroubleShooting
TroubleShooting
Subscription & Billing
Subscription & Billing
Getting Started
Getting Started
Installation
Installation
Inspect Traffic
Inspect Traffic
HTTP Rules (Modify Traffic)
HTTP Rules (Modify Traffic)
Overview
Request Modification — Redirect URL (Map Local, Map Remote)
Request Modification — Replace Strings (Switch Hosts, API Endpoints)
Request Modification — Modify Headers
Request Modification — Modify Request Body
Response Modification — Modify Response Body
Request Modification — Modify Query Params
Response Modification — Modify DOM/Inject scripts
Request Modification — Modify User Agents
Request Modification — Delay Request
Response Modification — Cancel Rule
Organizing Rule — Grouping
Organizing Rule — Import/Export Rules from File
Organizing Rule — Pause/Resume Requestly
Organizing Rule — Rule Operators
Organizing Rule — Advance Targeting
Organizing Rule — Sharing Rules
Request Modification — Map Local
Request Modification — Map Remote
Organizing Rule — Pinning Rules
GraphQL - Modify Request & Response
Import / Export — Charles Proxy Rules
Test Rules — Test URL Condition
Predefined Functions
Test Rules — Test this Rule
File Server
File Server
Public API
Public API
Guides
Guides
Session Book
Session Book
Subscription & Billing
Subscription & Billing
iOS Apps
Prerequisites
- Download the Requestly Desktop app, if you haven’t already.
- Start the App and make sure that your iOS device and your computer are on the same network.
Setup your iOS device for interception with Requestly
Setting up an iOS device requires the following one-time manual setup. In case you forget, you can get these detailed steps inside the desktop app by clicking on
Connect Apps button as shown below. A popup modal will open, click on setup instructions for iOS under Mobile apps & browsers section.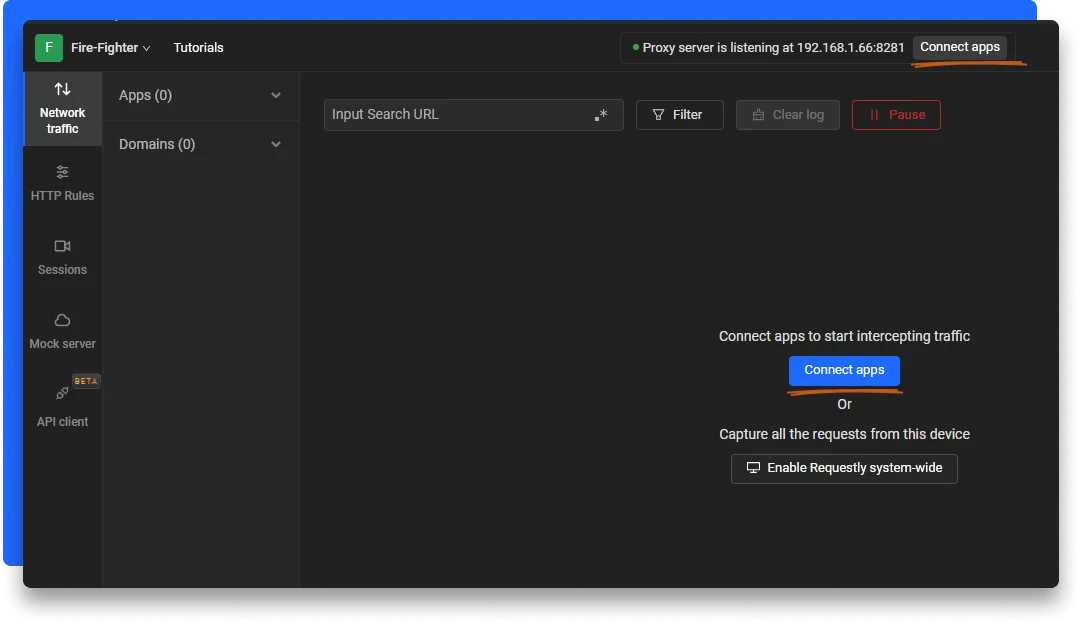
Setup the proxy
- In your iOS device, navigate to
Settings -> Wi-Fi -> Select current Wi-Fi -> Configure Proxy
- Set the proxy settings to
Manualand then enter the IP address of the computer and the proxy port. You can find these on the top banner inside the Requestly desktop app

- To ensure that the proxy has been set, visit http://amiusing.requestly.io . If the rendered page shows success as follows, means the proxy is now correctly configured.
Download the SSL certificate as a custom profile
- Now open Safari and go to http://requestly.io/ssl (remember to use HTTP, not HTTPS).
- This should download a custom profile on your device which contains the Requestly CA certificate a. alternatively you could download this certificate as follows from the Requestly desktop app b. But make sure to transfer it to the device either using airdrop or by emailing it to yourself. Only then will the iOS device identify it as a custom profile
Install custom iOS profile
- Install the custom profile
- Now to install the downloaded custom profile go to Settings. You should see a new option at the top that says Profile Downloaded. Select that to install the profile
- Click on Install. This will also ask you to enter your pin/passphrase. Once everything is complete, click Done on the top right to finish the installation and navigate out
- Install the new custom iOS profile

Enable trust for SSL certificate
- Finally, you need to enable trust for CA certificates that were installed along with this custom profile. Go to
Settings -> General -> About -> Certificate Trust Settings
- You should see a certificate by the name of RQProxyCA. Enable the trust for this certificate enable trust for Requestly's certificate authority for intercepting HTTPs traffic
Reverting the setup
Remember to disable the HTTP Proxy in your Settings when you stop using Requestly, otherwise, you'll get confusing network failures in your applications! You just need to set the network proxy the next time you want to debug with Requestly.